Well…. so much has happen since we last spoke, hasn’t it?
This whole pandemic thing has really changed some of our lives hasn’t it? I hope that you’re OK and haven’t been too badly effected.
It’s certainly strange times and boy! aren’t we glad we have our crafting, to help keep us calm and take our mind off things.
Many of us have put our sewing skills to good use, making scrubs and masks – I made some scrubs bags (my dress-making skills are not that good). For many people life has carried on as ‘normal’ – medical staff, care-worker, supermarket staff, delivery drivers and utility workers, all for whom I’m so grateful. I was furloughed for 14 weeks but am now back at work, which feels a little strange at times – it’s feels quite unusual to try to chat to customers with a face covering on and I have even more admiration for medical staff who have to have full PPE on for up to thirteen hours at a time!
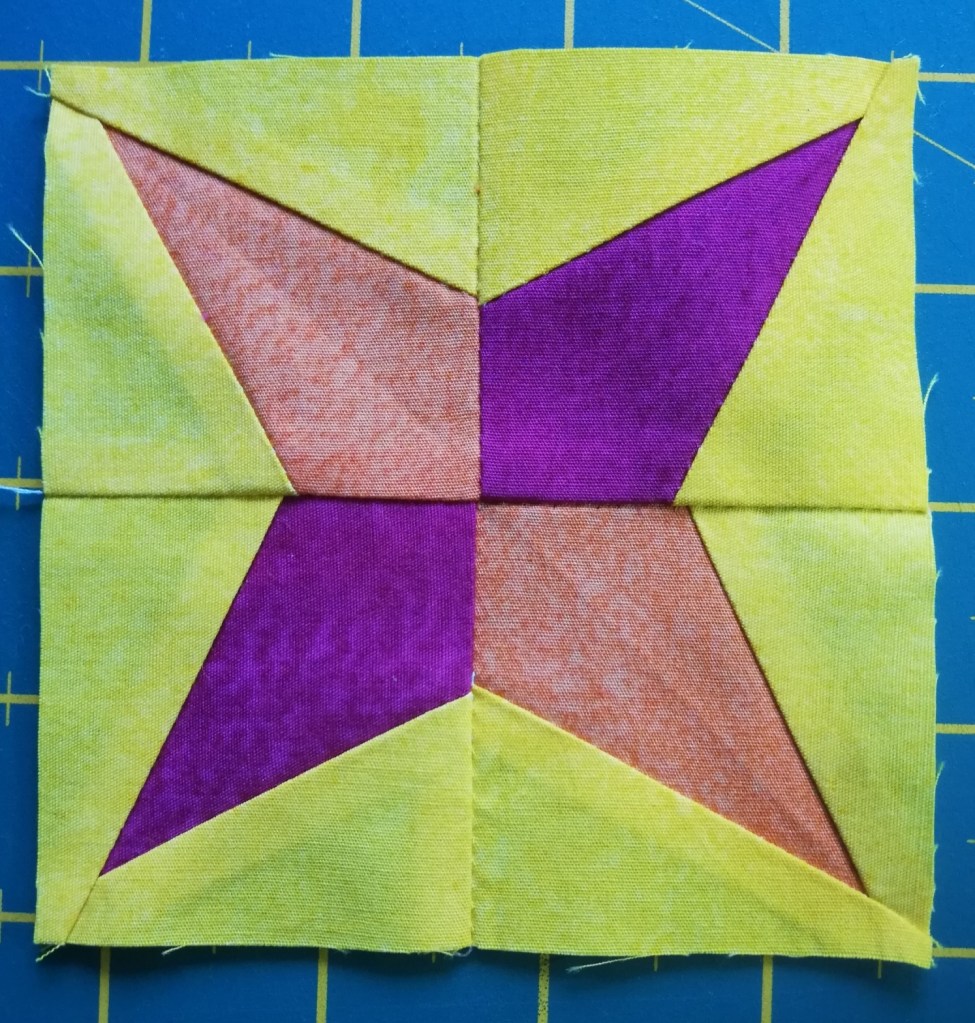
I have been working with Natasha on her show Natasha Makes and have been doing some designing and demonstrating – this week I demonstrated the Star Tile wall hanging/mini quilt and used the Creative Grids Kitty Cornered ruler to create the unit to make the ‘Star ‘ block, but I also gave the templates to make the units using template plastic or foundation paper piecing.


I only gave basic instructions in my pattern for Foundation Paper Piecing (FPP), so I thought I would share some more detailed instructions for those who have never tried FPP before.
Foundation Paper Piecing can be a little daunting when seeing it for the first time, as it’s a different way of doing patchwork, working on a foundation , usually paper, but you can use fabric or light-weight interfacing.
You will usually need to print or trace the pattern onto paper and the instructions will tell you how many – use the thinnest/ cheapest paper you can – you can buy foundation paper, but economy printer paper works just as well.
Trim your pattern around the edge leaving a gap around the line for the seam allowance

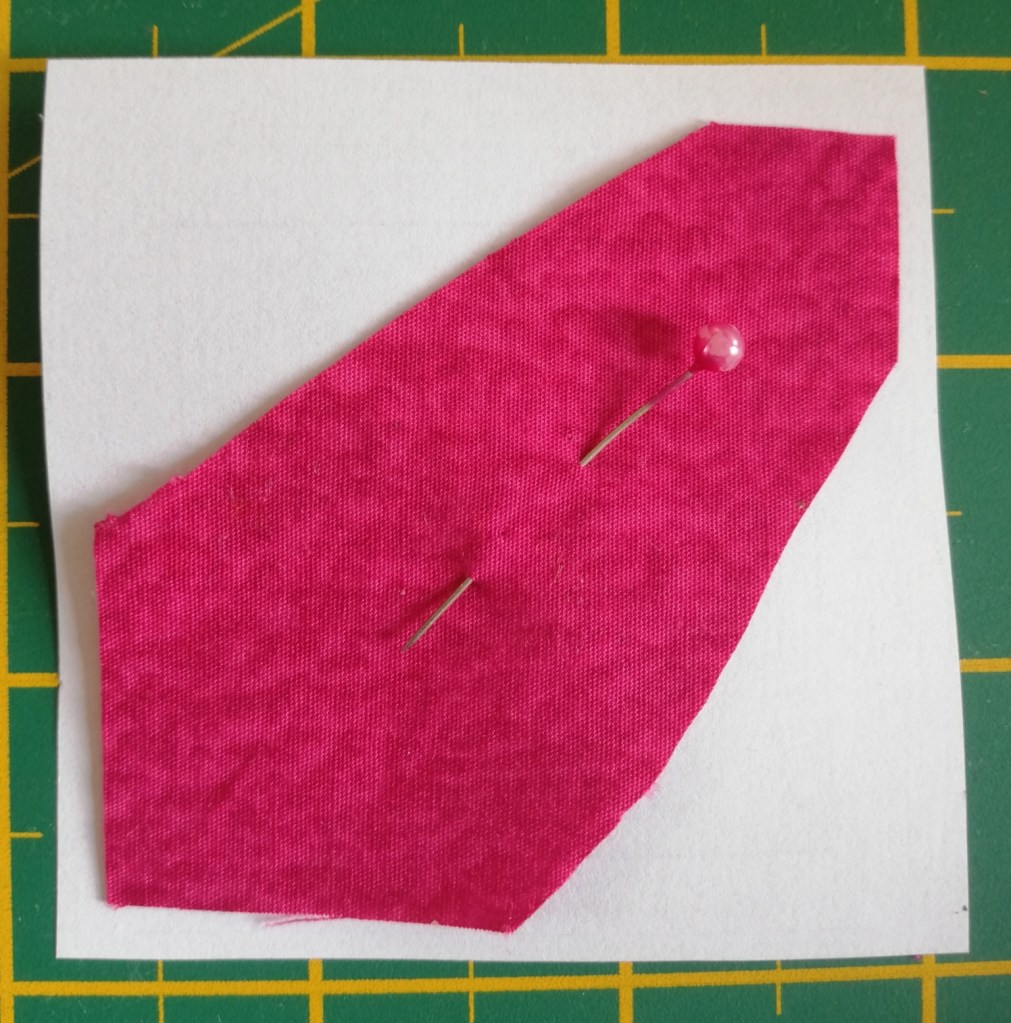
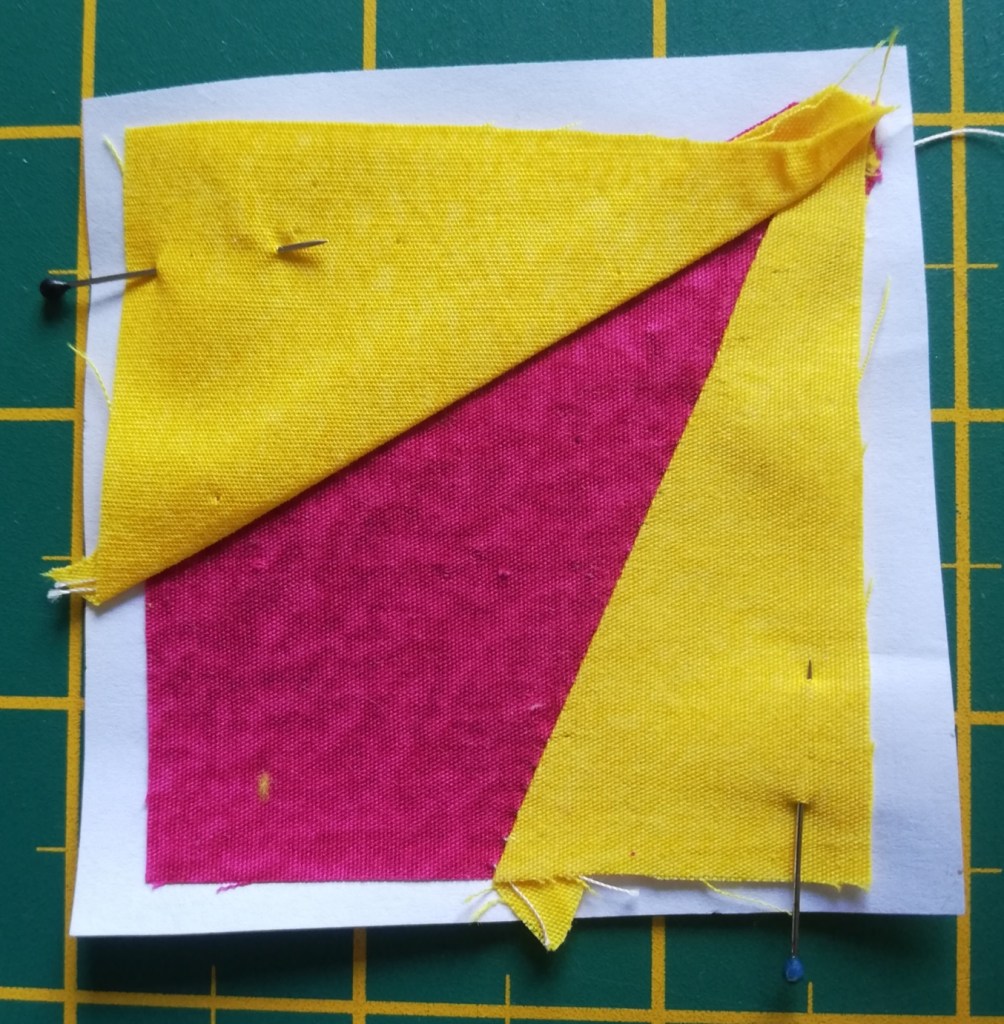
Following the numbers on the pattern starting with one, cut a piece of fabric that will cover the shape with a generous seam allowance

Turn the paper over and pin the shape to the paper so that it covers that area – hold the paper up to the light so that you can check you’ve got it in the right place – remember you need to have fabric going past the shape lines for seam allowance
Flip the paper back over and cut the piece of fabric to cover shape 2

Turn the paper over and place the second piece of fabric right-side together on top of fabric one, so that the edge of fabric one and two are together ready to seam and hold together with your fingers, turn the paper back to the printed side and place a pin along the line between area 1 & 2 (this will be the seam line), pinning through the two fabrics.
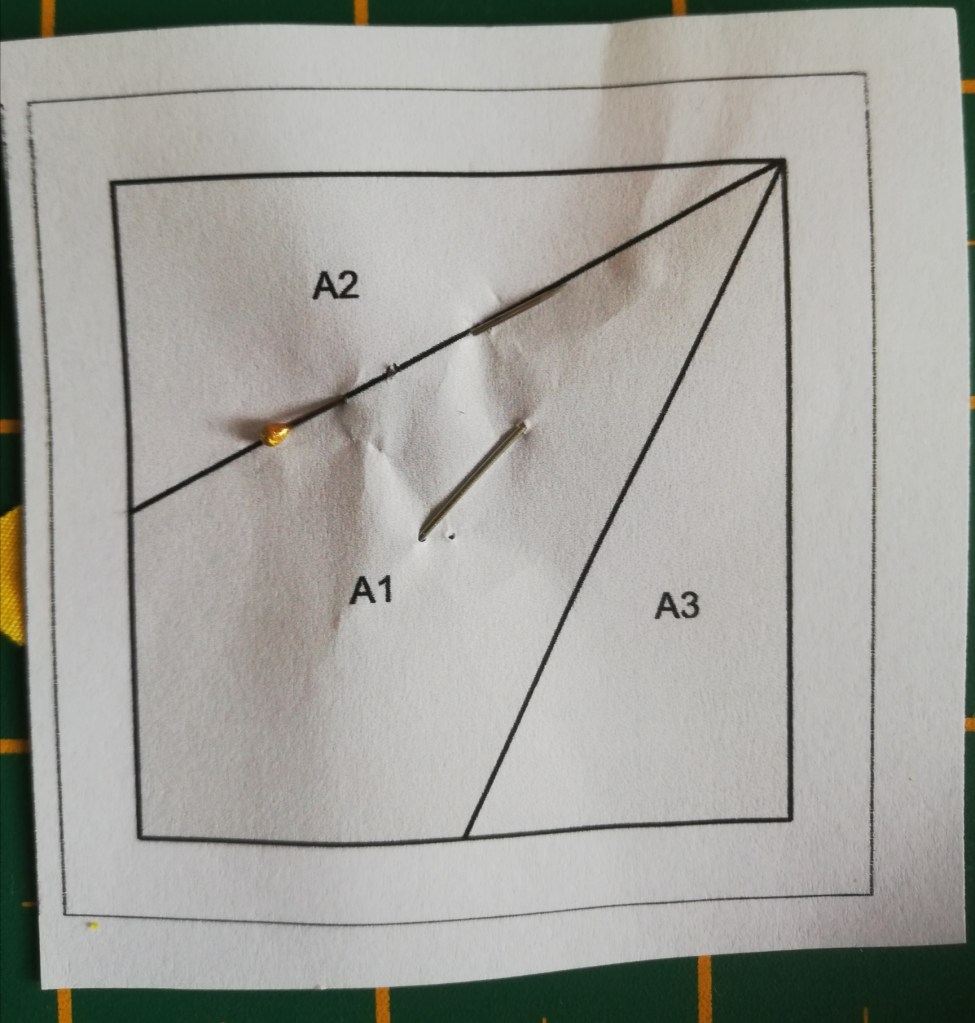

Turn fabric 2 back to make sure that it still covers area two and covers the seam allowance around the the area, flip it back down and turn the paper over and pin the fabric down with pins adjacent to the line, ready to sew

Sew along the solid line between area 1 & 2, using a smaller stitch length than normal (on my machine I use 22) and starting and finishing in the seam allowance area

Turn the paper over and check again that the fabric covers area two and into the seam allowance. Fold the paper back from the fabric, so that the seam allowance is exposed

Place the 1/4 inch mark of your ruler along the seam line and trim any excess fabric away

Fold the paper back down and turn over to the un-printed side and fold fabric two back and flat against the paper, you might want to press it down to get it nice and flat, pin the fabric to the paper, to prevent it flopping about
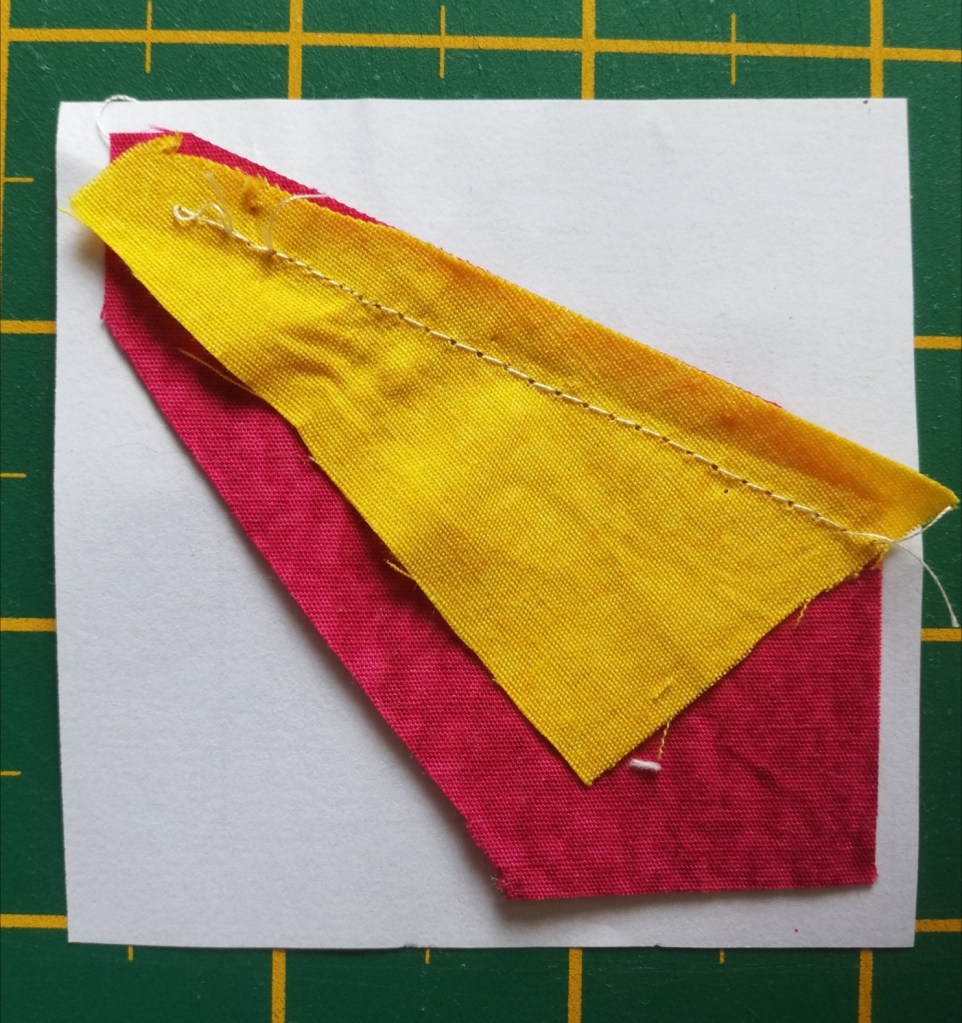

cut a piece of fabric to cover area 3, making sure it cover at least a 1/4 inch over fabric 1 and into the seam allowance

Turn the paper over and place fabric 3 right-sides together over fabric 1 and hold in place and turn the paper back to the printed side and pin along the solid line, through the two fabrics


Flip the paper over and fold the fabric back to check that it still covers area 3 and the seam allowance, fold it back again ready to sew. Turn the paper back to the printed side and pin through the paper and fabrics adjacent to the solid line between area 1 and area 3.

Sew along the solid line between area 1 and 3, starting and finishing in the seam allowance.

Fold the paper away from the fabric and trim a 1/4 inch seam.

Fold the paper flat again and turn it over to the fabric side, fold and press the fabric back to cover area 3 and pin in place.
Turn the paper over to the printed side. Lengthen the stitch on your machine to the largest you can (it’s only tacking, so needs to be easy to remove) and sew around the square in the seam allowance quite close to the edge.

Trim the square on the fine line which is the edge of the seam allowance.
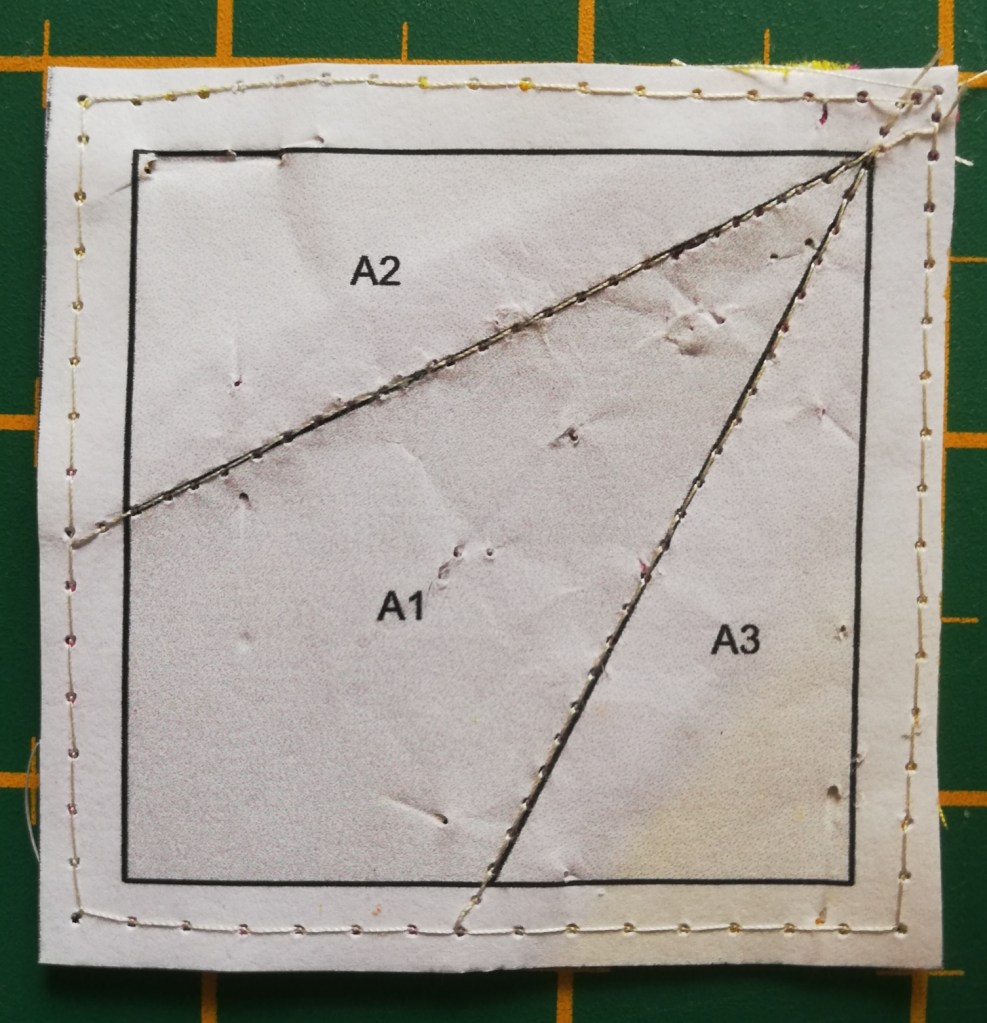
This is one quarter of your star unit, you will need to have four to make the block. Sew two quarters together and the sew the two halves together, you can use the sold line as a stitching guide.

Once you have made your block, you can then remove the paper, taking care not to pull the seams – I use a dampened cotton bud to run over the line of stitching on the paper side, this softens the paper and makes it easier to remove.
I hope that you will give this method of patchworking a try, you can create some really intricate designs. I’d recommend looking at Jo Carter’s Two Owls Design and Victoria Peate’s Little Black Duck for some fun and quirky FPP patterns to try.
Until next time,
Stay safe and happy stitching
Jane xx

Jane your demonstrations are always superb and I’m terrible for not reading instructions (I’m always too keen to get on with it) so clear sequential photos are just the job. Thank you!
LikeLiked by 2 people
Wonderful comprehensive instructions, Jane, thank you. I’ve not done FPPbefore but think I’ve done one of these star blocks with the BOTM I started with SQ. Will have a go soon.
LikeLiked by 2 people